
Overview
Clear Estimates comes pre-loaded with over 200 different templates for common jobs. Sometimes, though, you may want to create new templates for your own specific project types.
We're thrilled to introduce a brand new feature that will make building your own templates easier than ever!
Using the brand new Save Project as Template feature, you can take any completed project and instantly save it as a new template in your account - in just a few clicks! Take a look at the guide below to see how it works!
Note: The Templates tool is now located in Tools > Template Library.
Understanding Templates
First, it's important to understand how templates work. Templates are a pre-loaded list of parts, or line items, that can be added to your project all at once. Templates help you avoid forgetting parts, and they save plenty of time when building a project.
Check out this resource on understanding templates:
How Templates Work
Template parts always get their information from your Part Library. This means any parts in a template must first exist in your Parts tool.
In order to create a template from your project, the Save as Template tool will find your project parts in the Library, and attach those parts to a new template automatically.
So why does this matter?
If you've adjusted any parts in your project, the Save as Template tool will not save the part changes back to your library or override the original part.
Instead, you'll have a choice between using the default part settings from your library, or creating a new part with your settings from the project. Those parts will be saved into your new template based on your selection.
If you've created a new custom part in your project, that part will be saved to your library first, and then attached to the new template.
So, if you've edited parts in your project, you will be asked to choose whether to use the default Library part - or create a new part with your edits:

Fixed Quantities
When creating a template from a project, it will automatically save each template part using a Fixed Number of Units template formula.
That means that whatever number you put in for the "Fixed # of Units" is the quantity that this part will use in the estimate when you enter the template quantity.
You can save each part as a fixed number of 0, 1, or use the part quantity from the project.
If you want to adjust your quantity formulas or change how the template behaves, you can do that after you create your template. See a quick example here:
Save Projects as Templates - Quantity Formula Examples
In fact, as soon as your template is saved, it will automatically open in the Templates tool so you can adjust the formulas, if you choose.
See a full guide on template formulas here.
Saving the Main Project as a Template
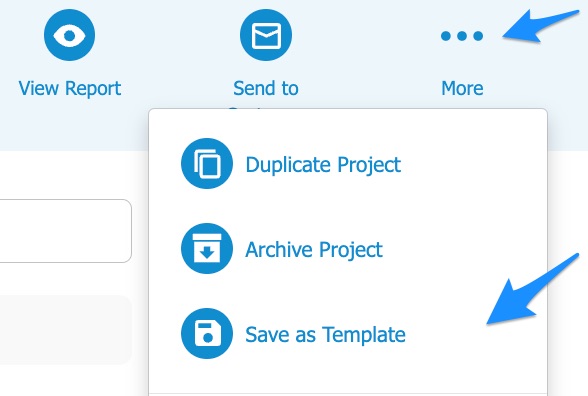
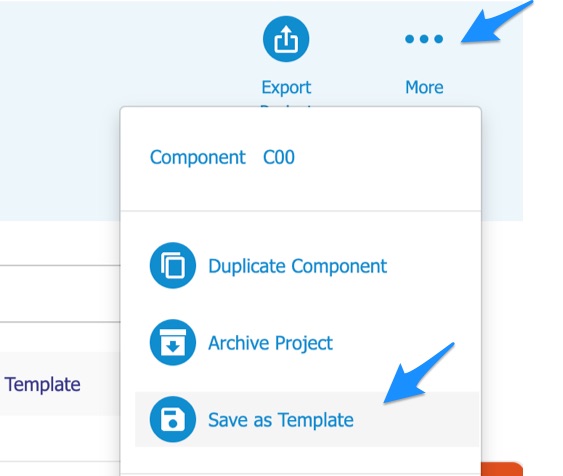
If you just want to save the parts in your main project list to a template, just click More > Save as Template from your Projects page:
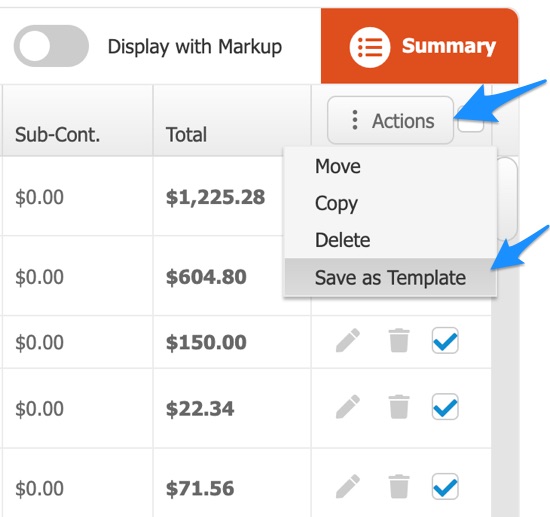
You can also select a handful of parts from the project, and save a template with only those items. Just check the parts you need using the checkboxes, and click Actions > Save as Template:
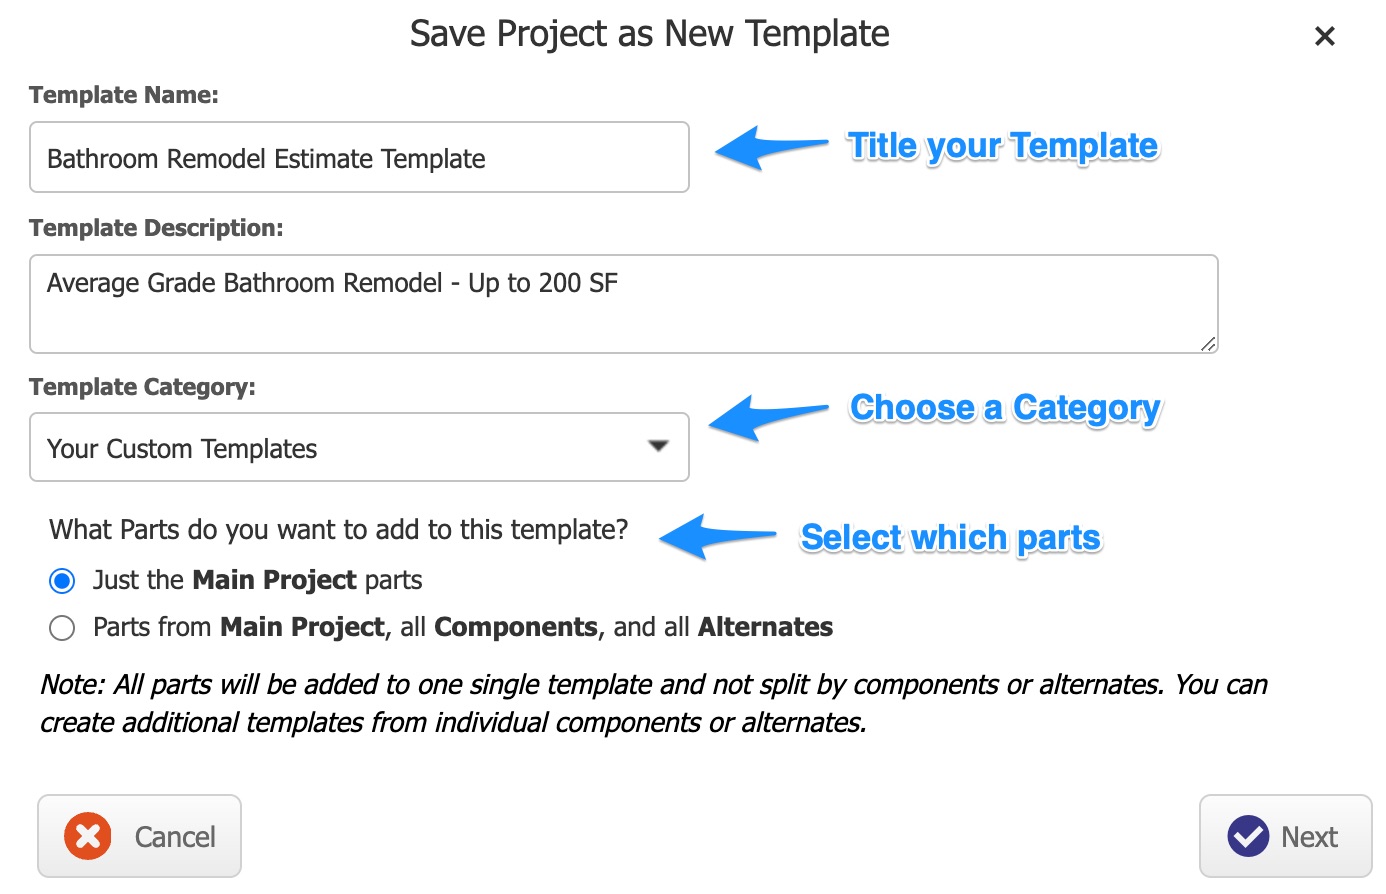
Next, title your template, and add a description.
Choose a template category for your template. You'll use this to find your template later.
Then confirm if you only want to use the main project parts, or if you want to use all parts from the main project, components and alternates.
If the second option is selected, it will group all parts from each section into one template list:
Click Next.
Now, decide what to do with parts you've modified in the project.
That means you've changed anything about a part in the estimate - description, unit cost, unit type, labor cost, labor rate, report text etc.
Since part changes like that cannot be saved back to your library automatically, you'll have two choices:
1. Create a new part for the template using your settings.
2. Use the part library settings for that part in the template.
Next, choose what to do with the part quantity formula.
You can set each part as a fixed number of units - 0, 1, or use the part quantity from your estimate: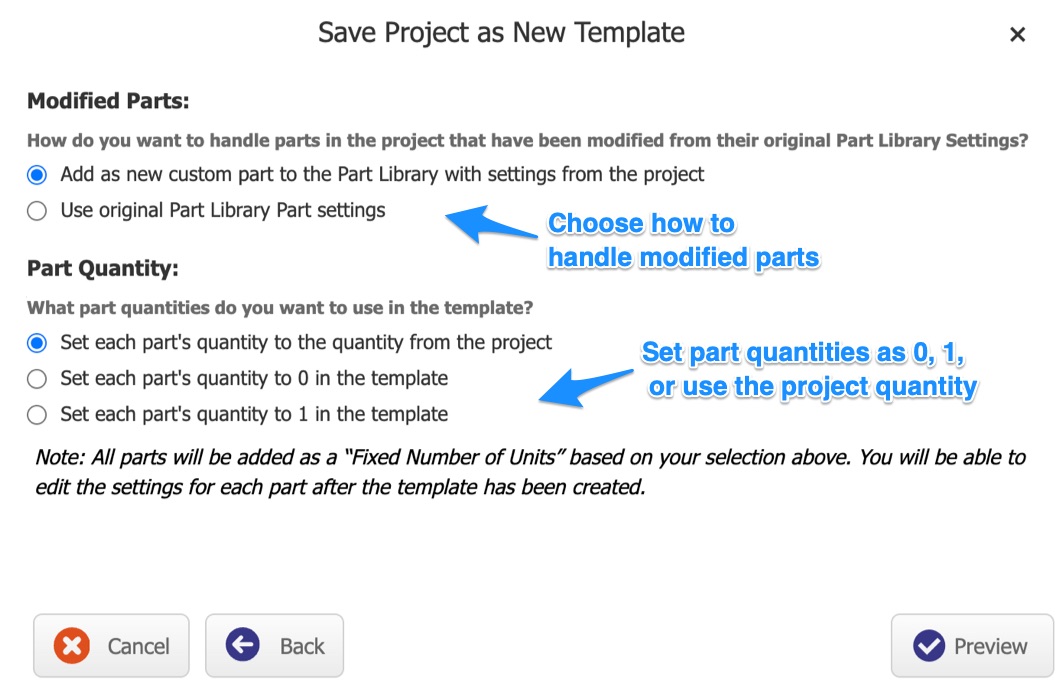
In this example, we've modified one library part in our estimate - “Install toilet, 1 piece, elongated.” We've adjusted the unit cost and labor rate for this part.
The rest of the parts were added from the library as is, with no changes.
In the preview, we'll see blue checkmarks for parts that will use Part Library settings. You'll see a green plus for parts that will be created as new parts with your settings:
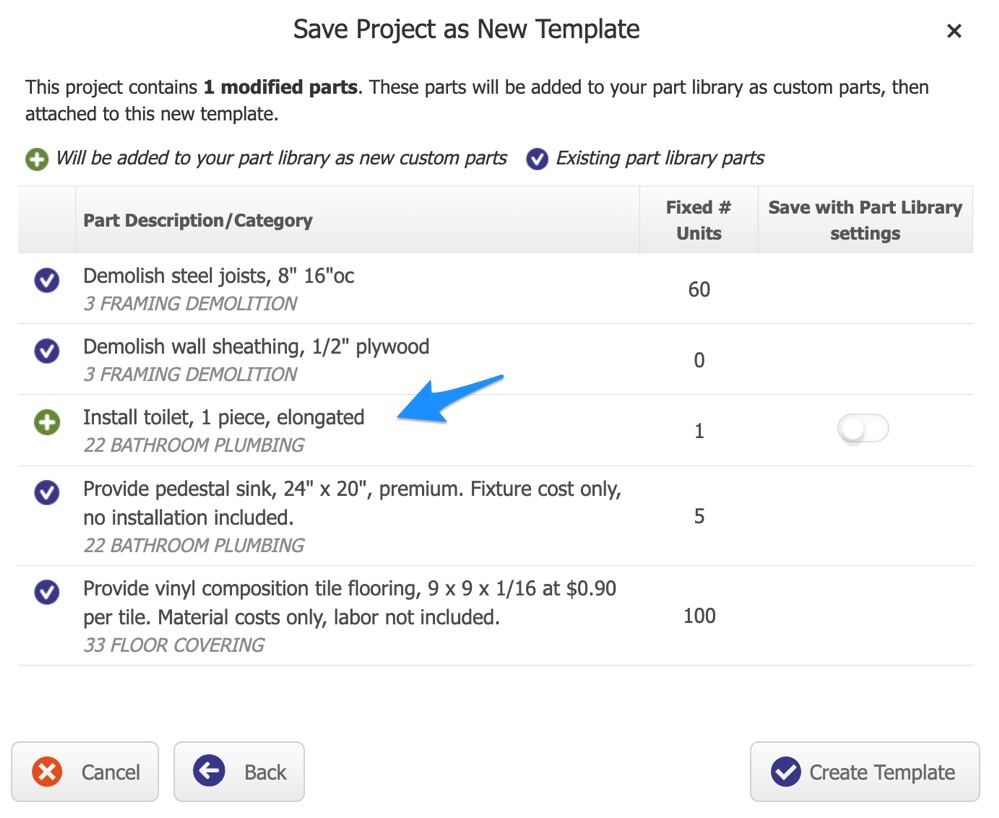
You can override that setting for individual parts using Save with Part Library settings toggle. This will revert the part back to the default library settings:
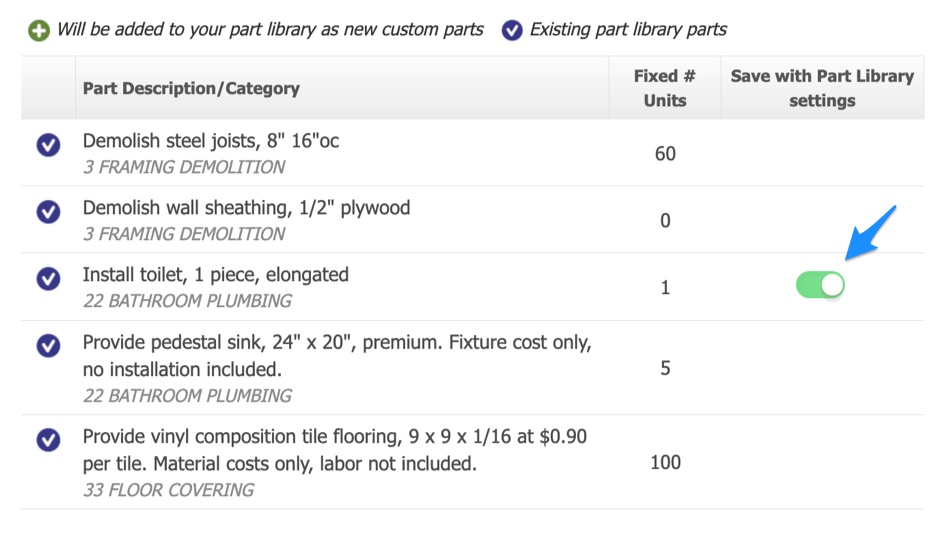
(For new custom parts, it will always add those as a new custom part to your Library).
Now, click Create Template and your template will be created automatically. With larger projects, this may take a few moments.
Once the template is created, your new template will automatically open up in the Templates tool.
From there, you can edit the template further - add additional items, or edit quantity formulas.
If you want to edit the default settings for parts, you can do that in your Parts tool.
Saving Components or Alternates as Templates
When saving the full project to a template, you'll have the option to also include any parts you have in Components or Alternates. You can check that option, and it will save the entire project as a template - including any parts from those sections.
To save individual components or alternates, just open up your alternate or component using the pencil.
Then, click More > Save as Template:
This will save only the parts in each specific component or alternate as a new template.
That's it! This feature will save you countless hours assembling templates. You can build a project once, and easily save it as a new template. Then, that template will be available for any of your projects going forward!
Here's a quick overview of the basics.
Continued Learning
How To Add Templates to an Estimate
Customizing Templates Overview
Understanding Quantity Formulas
Modifying Parts in Your Part Library