- Open a part with the 'pencil' button.
- Click "Select Files" in the Miscellaneous section.
- Upload the image and click "Save".
- Go to Reports > Boilerplate.
-
Check "Image Gallery" in your "Outro" boilerplate.
On some estimates, you may want to include images for your customer to view. For example, maybe you want to include a picture of a new vanity sink you're installing - so your client can see what it will look like before you get to work.
Fortunately, Clear Estimates lets you add an image to any part in your estimate! Here's how it works:
How To
First, click the pencil button to the right of your item:

This will open your "Adjust Part" window. Scroll to the bottom of this page.
Find the "Miscellaneous" section, and click "Select files": 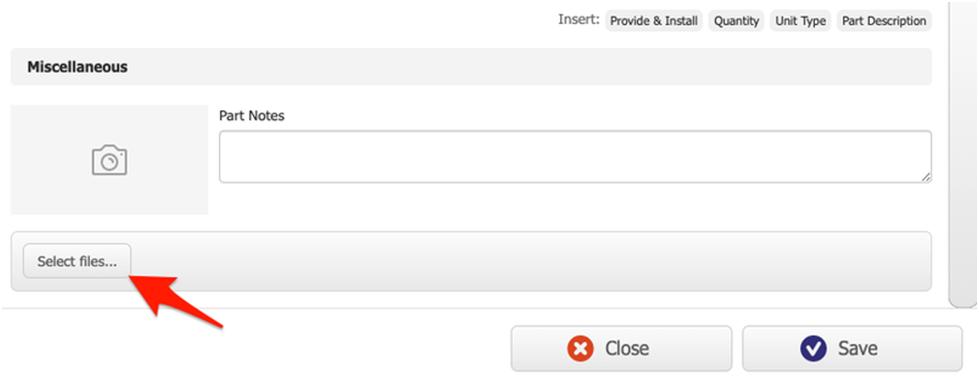
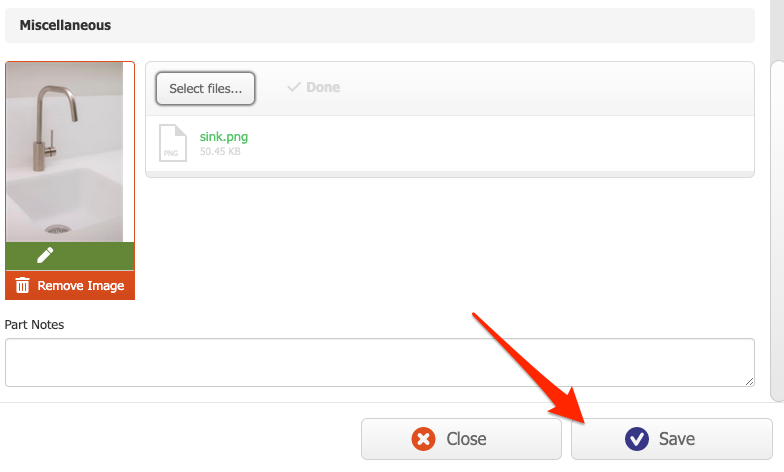
Choose a file from your device.
We recommend a maximum of 500 x 500 pixels per image.
When it's done uploading, click "Save":
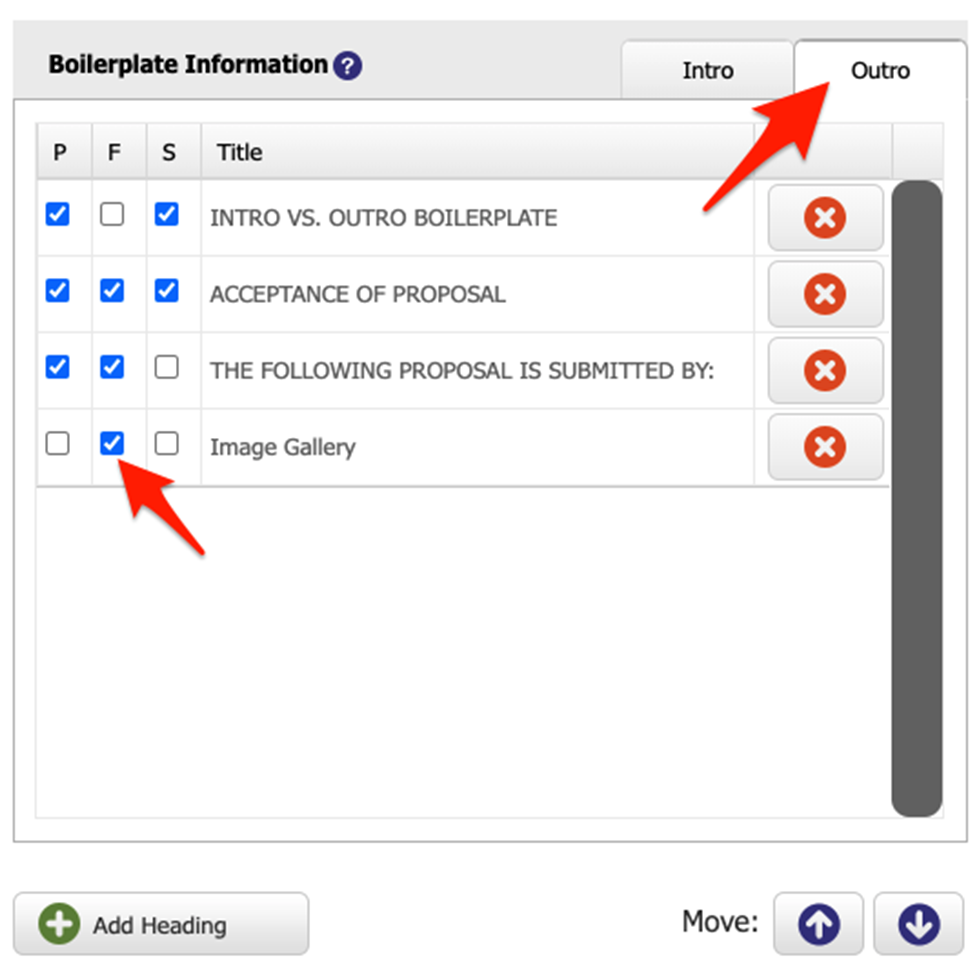
Close this window. Now, head to Reports > Boilerplate:

Scroll to "Boilerplate Information", and click "Outro".
Then, find "Image Gallery."
Click the checkbox for the report where you want your images displayed (we'll choose "F" for our Formal Report):
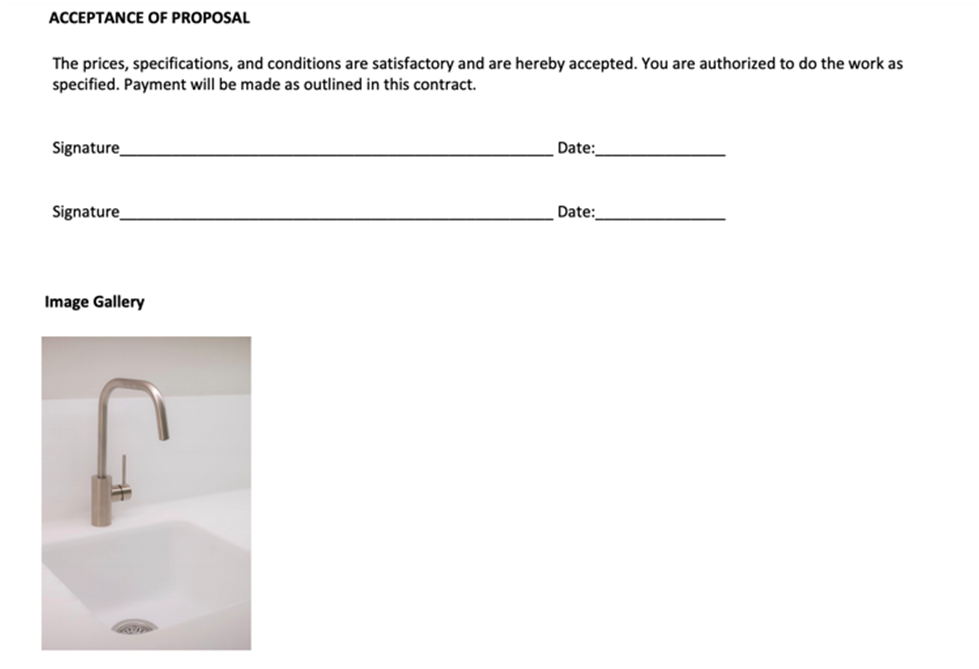
Now, when you click "View” from the Projects page, the image will appear at the bottom of your proposal:
You can also permanently add an image to a part in the database from your "Parts" tool!
Keep in mind, you can only upload one image for each part.
Image Captions
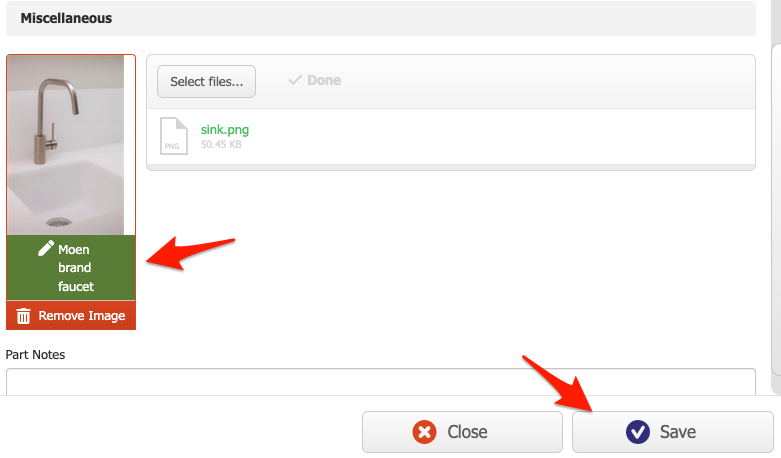
Want to add an extra description for your part image? No problem! You can do this easily, when adding your image from your Adjust Part tool.
Once you select an image to add to your part, click the green Pencil to add a caption: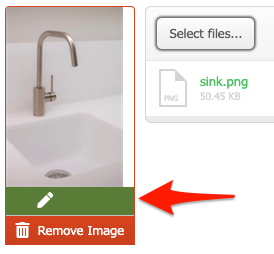
From there, type in your image caption. Then, save your part:
Your caption will display above your image, on your proposal: 
Multiple Images
You can add as many images as you need to your proposal - by attaching one image each to the various parts in your estimate.
For more flexibility with images in your proposal, i.e. "before and after" photos, etc, you can do this in MS Word.
Hover over "View" on your Projects page. Then, choose "Save as MS Word".
From MS Word, you can add as many pictures as you need!
Thanks for reading!