Understanding Report Text
Clear Estimates gives you flexibility with line item text – making it easy to have custom descriptions for your different reports (proposals)!
For any part, you have three report text options – Preliminary, Formal, and Subcontractor text. Each text box is printed on the different proposals – Preliminary, Formal, and Subcontractor.
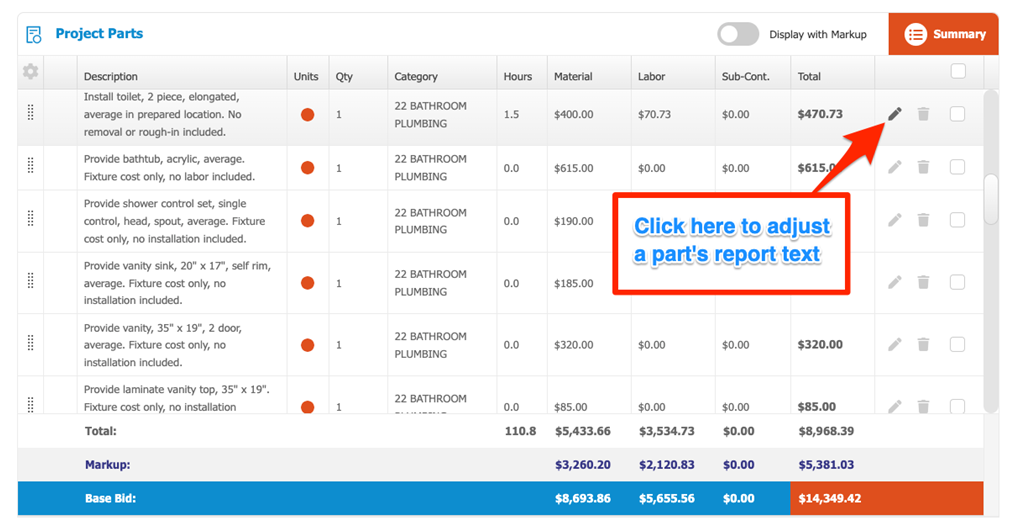
The “Description” on the Project Overview is your part description in Clear Estimates. To adjust the text that appears on your reports click the grey pencil to the right of any part to see your report text:
When you are in the "Adjust Part" window, scroll to the very bottom.
At the bottom you will see the three text boxes - "Preliminary", "Formal" and "Subcontractor" at the bottom.
This means that if you type "Install a roof" in the "Formal Text" box, there will be a line item on your formal report that says "Install a roof" - exactly as you typed it.
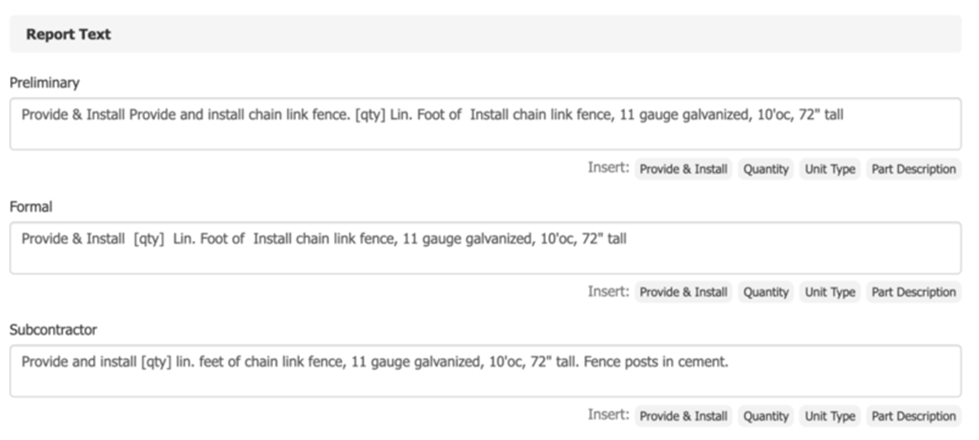
The report will display exactly what you type, regardless of the "description" of the part, or the cost of that part.
If you have a part in your project for installing a gas range, but you type in "Install wood flooring" into the "Formal Text" box, you will see "Install wood flooring" on the formal report instead.
The text that is written in the "Description" box at the top of the "Adjust Part" tool will not be printed on the reports. This description is for internal use, to make sure you can find the parts you are looking for.
(You can always click the “description” shortcut button in your formal text, if you do want the description to be printed on the formal report.)
The reason there is a text box for each of these reports is so that you can completely customize the way line items display on each report. This way, you can have different text show up on each report for the same item.
Here is an example:
Let's say you have a part for "installing tile flooring". For this project, you want to install 250 square feet of flooring.
On the preliminary proposal, you don't want to include the exact square footage, just that you will be installing flooring. In your formal proposal, however, you do want to print the quantity of tile.
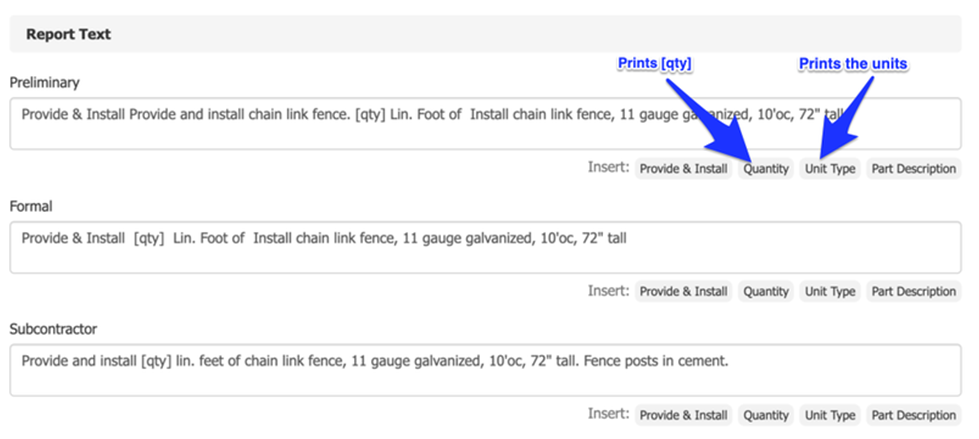
"[qty]" will print the actual quantity of the part (if we have 250 as the quantity, it will show that on the report instead of [qty]):
Report Text Shortcuts
When adjusting items in your Adjust Part tool, you may have noticed the grey “Insert” buttons: “Provide and Install”, “Quantity”, “Unit Type”, and “Part Description”. What are these? When should you use them?

You’ll see these buttons right below the text boxes for the “Preliminary Text”, “Formal Text” and “Subcontractor Text”. These text boxes are where you can customize what text shows up on each report for a particular part.
For example, you can edit a part (say, for installing some tile flooring) and write in the text that you want to show up on each report (Preliminary, Formal, or Subcontractor).
This is a great way to customize those reports - The verbiage that describes each part can be different on each of your report options.
Back to the “Insert” buttons, why are they there? These are just shortcuts so you don’t have to type out some of the most commonly used words. Instead, just click the buttons and Clear Estimates will type it for you! Here is what each does:
"Provide and Install"
- You can customize what the “Provide and Install” button prints in your Options Tool.
“Quantity”
This will print the quantity of the part.
- In the edit part window it will write “[qty]” - but when it prints on the report, it will print the actual quantity of that part instead of “[qty].”
- Clear Estimates will always print the quantity that you input, so you can change the quantity without having to change the text!
“Units”
This will print the unit type of the part:
- “Square Feet of"
- “Pieces of”
“Part Description”
The description from the "Description" box at the top.
- It will print whatever is written in the “Description” text box
- Even if it is a custom description.
Example:
One of the first parts in “09 Floor Framing” is “Install 2″ x 8″ single member beam”
- Its units are “linear feet”.
- Clicking the “Insert” buttons right in a row will write the following into the text box:
“Provide and install [qty] Lin. Feet of Install 2″ x 8″ single member beam”
- The “Install 2″ x 8″ single member beam” comes from the description box above when we click “Part Description”
- You can see that we have repeated “install” because it came from the “Provide and Install” and the “Part Description” so let’s clean it up to this:
“Provide and install [qty] Lin. Feet of 2″ x 8″ single member beam”
- As an example, let’s say we have selected “100” as the quantity for this part.
On the report, it will print off like this:
“Provide and install 100 Lin. Feet of 2″ x 8″ single member beam”
- Even if we change the quantity in the project, when we look at a print preview of the report, the quantity will update to the new Quantity we set.
Projects Page Shortcut
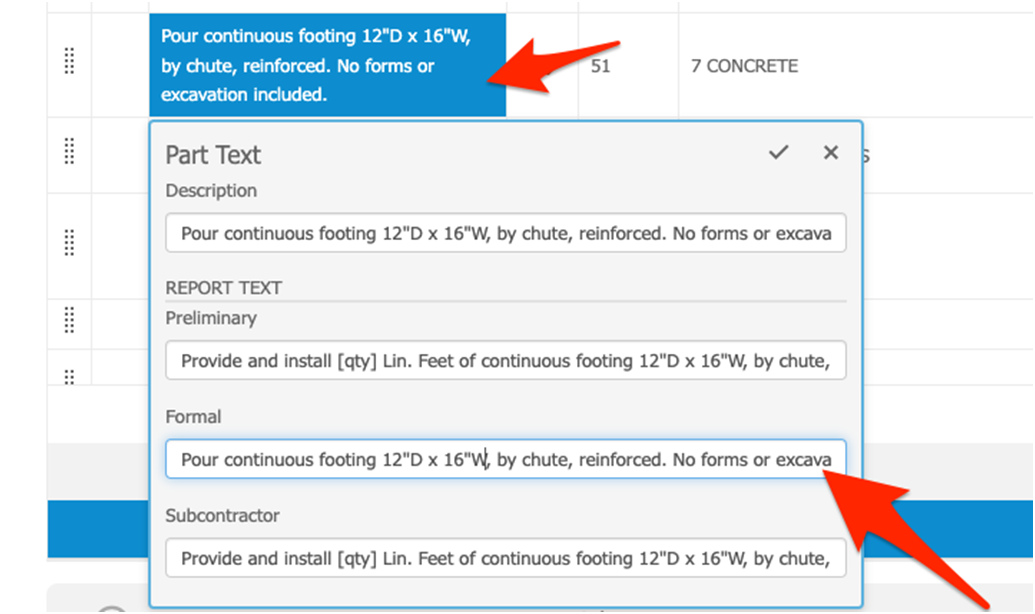
For quick changes without opening each part, simply click the part description column:
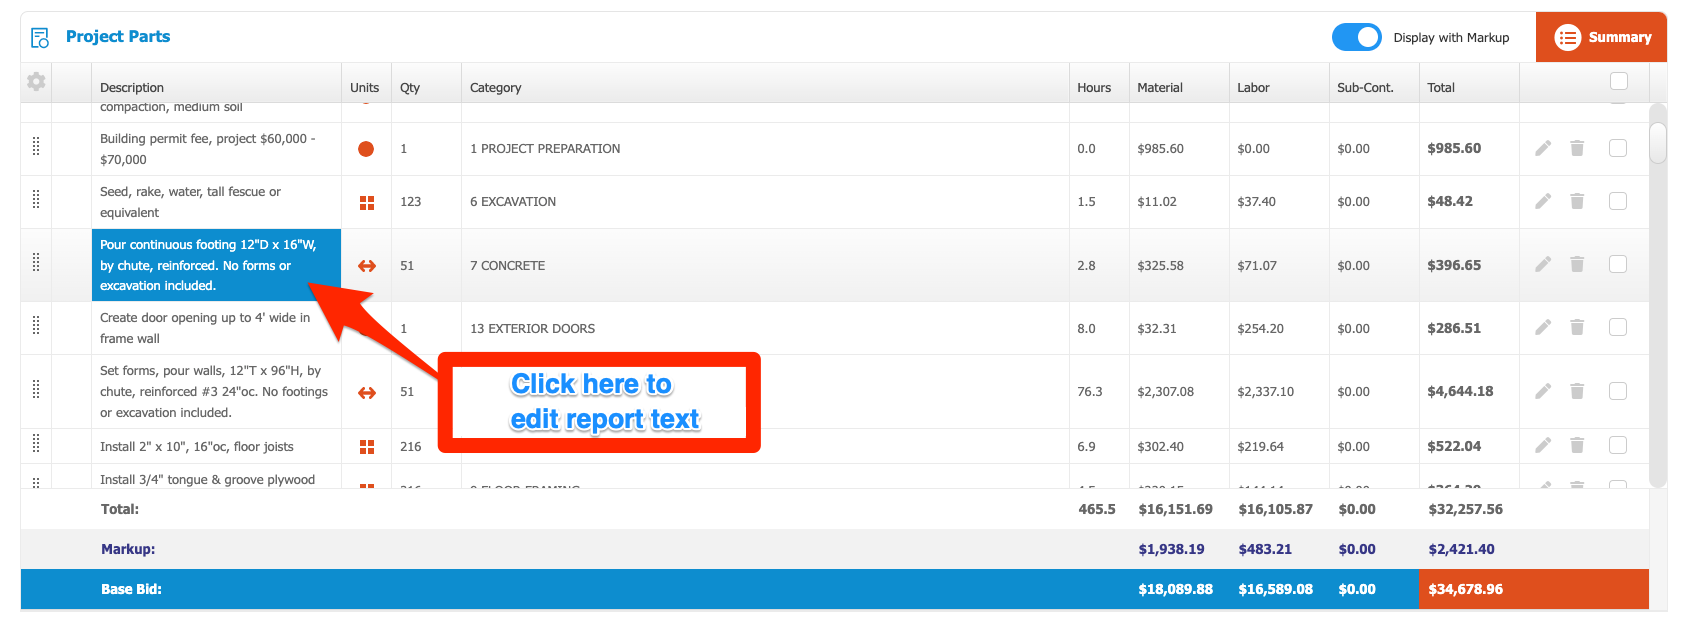
Then, you can edit the text for your different reports. For the Formal Report, be sure to edit your Formal Text:
Thanks for reading!