
Overview
Clear Estimates offers the ability to add a payment schedule to your estimate. This is an important aspect to add, as you want to be transparent about when payment is due!
Payment schedules can be calculated based on percentages of the project cost, or by fixed dollar amounts.
In this guide, we'll walk through the process for creating payment schedules, and adding them to your estimate!
How To
To set up a payment schedule, head to Tools > Options:

From the menu on the left, choose your Payment Schedule Editor:

To create a new schedule, click New Schedule:

This will create a blank schedule. You can title your payment schedule in the Title field:
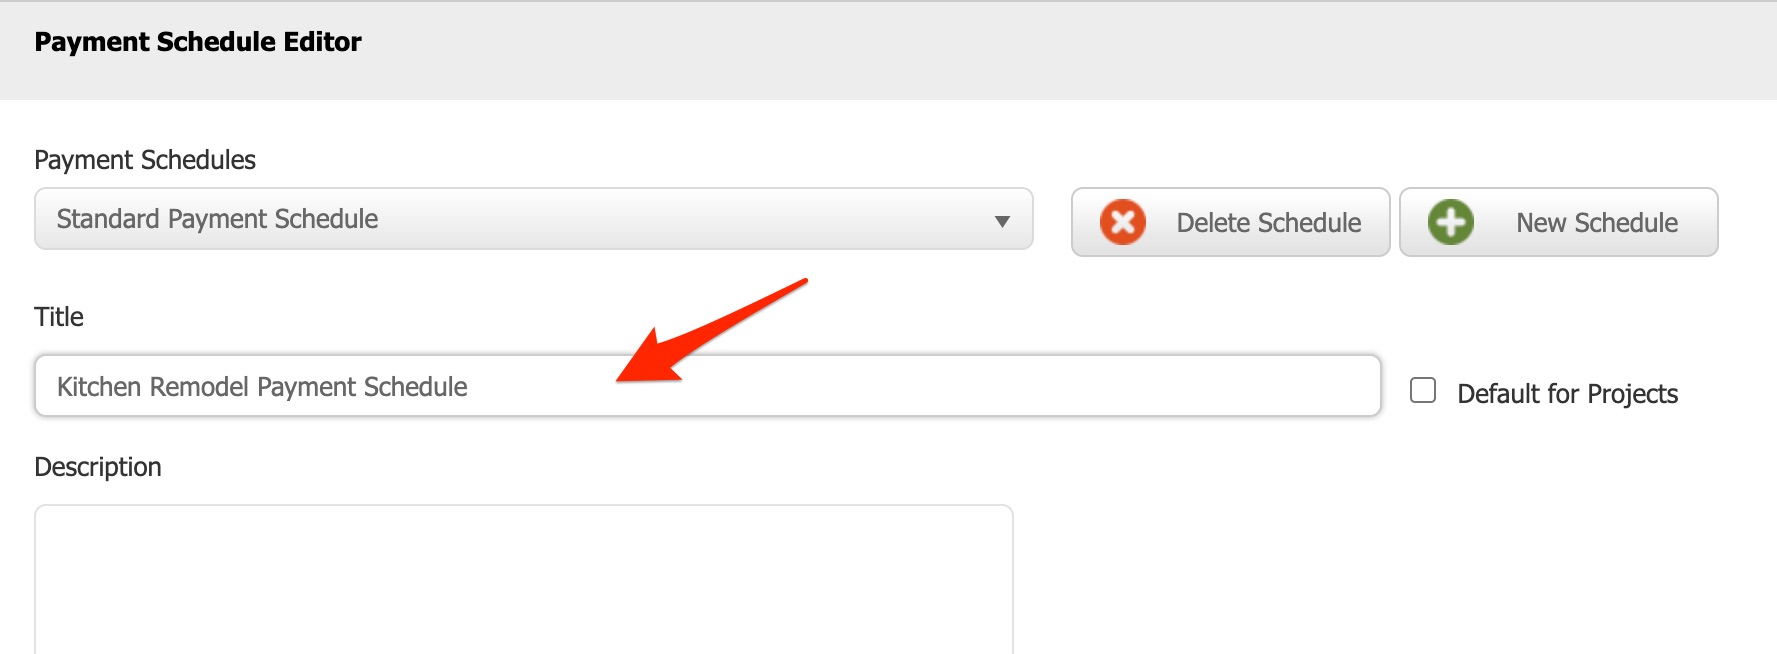
Leave the Description box blank.
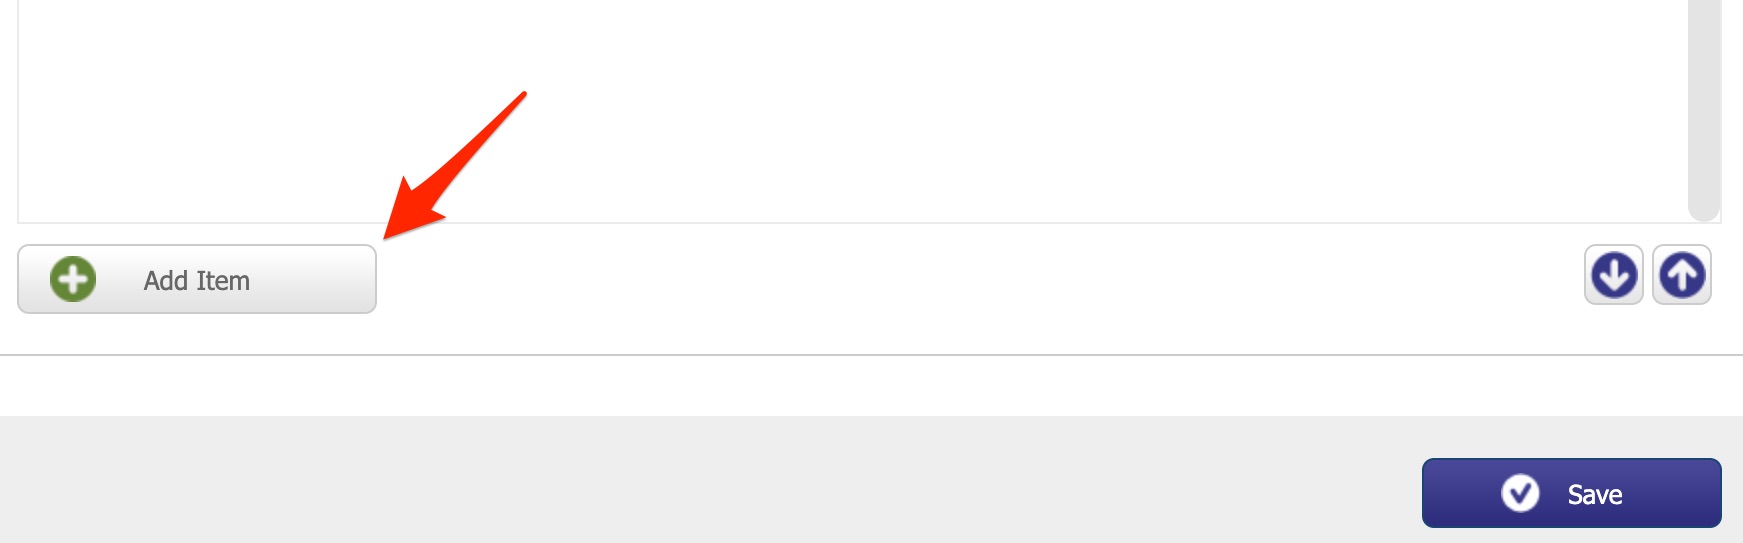
Now, scroll down to the bottom of this page.
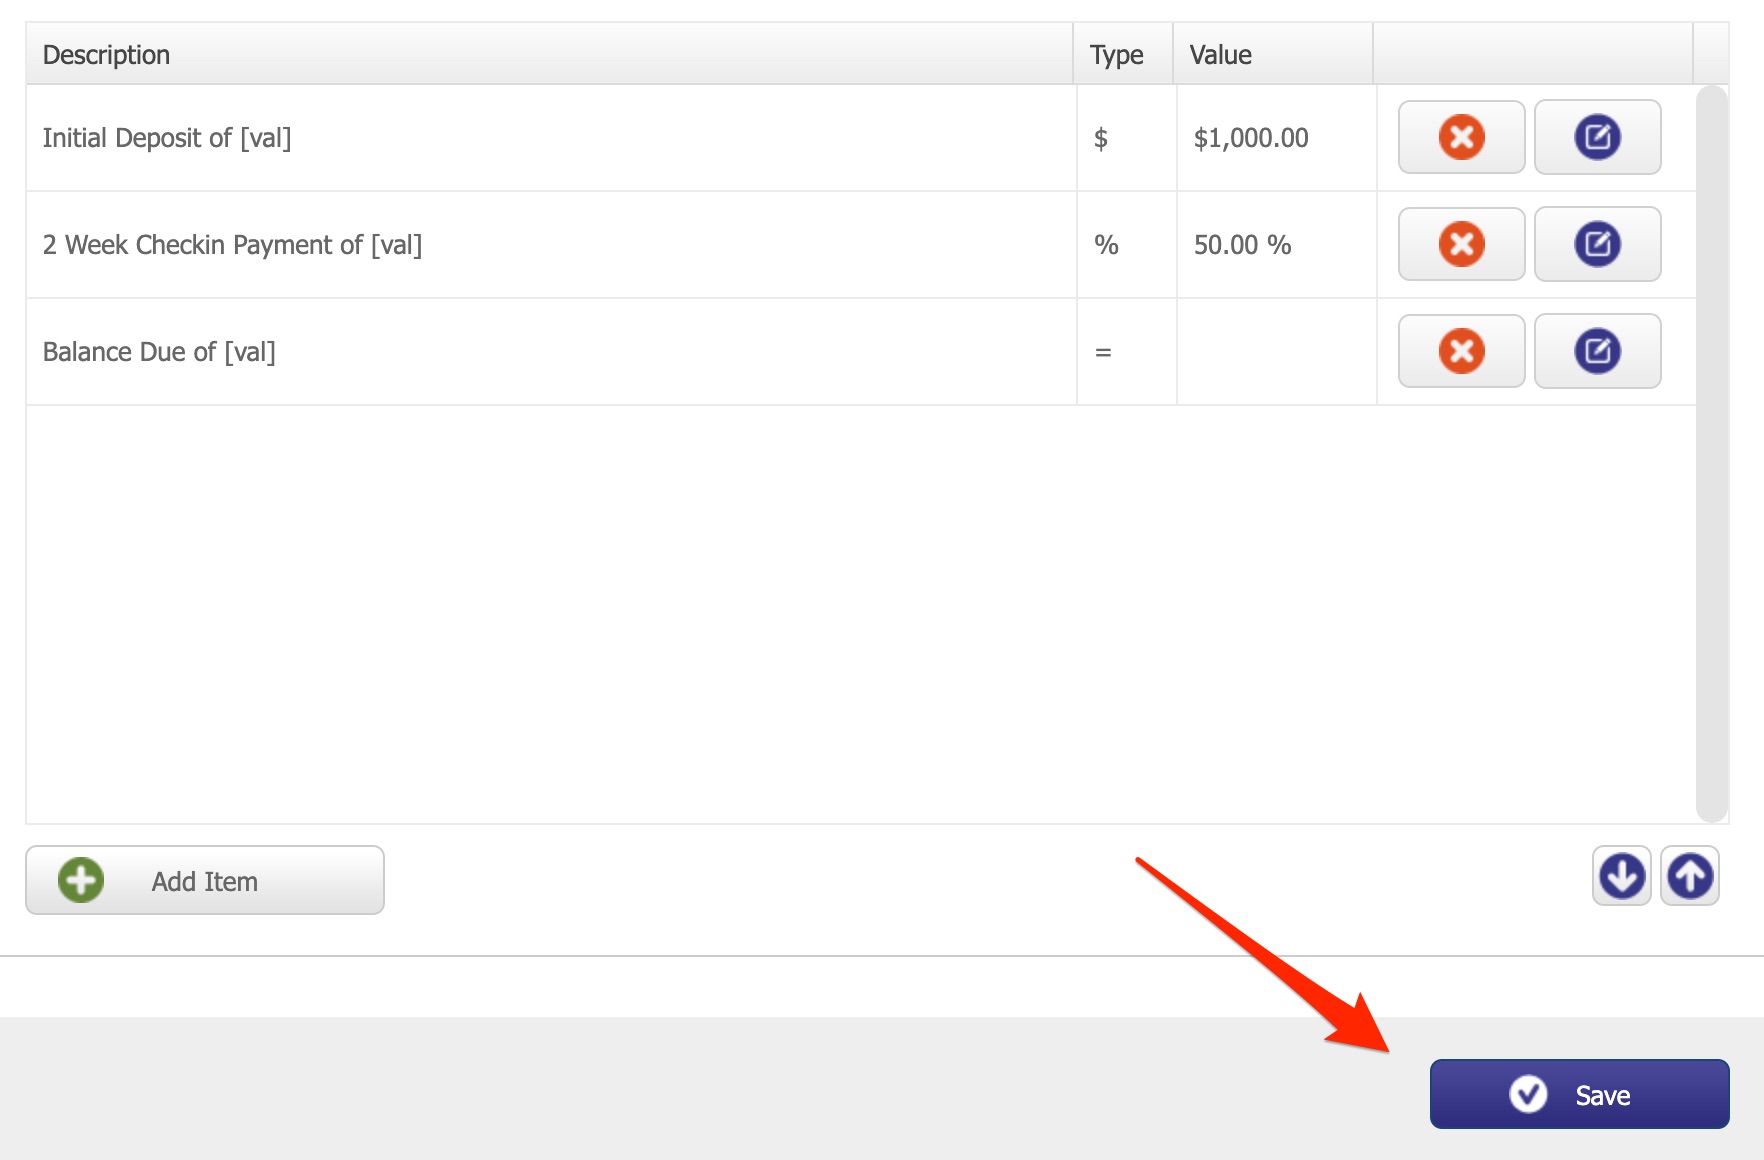
You'll see an option to Add Item. For each payment schedule line, you'll want to create a separate item:
This will pull up a box where you'll set up your item. There are three types of payment schedule items you can create. Here's how each option works:
Fixed Amount
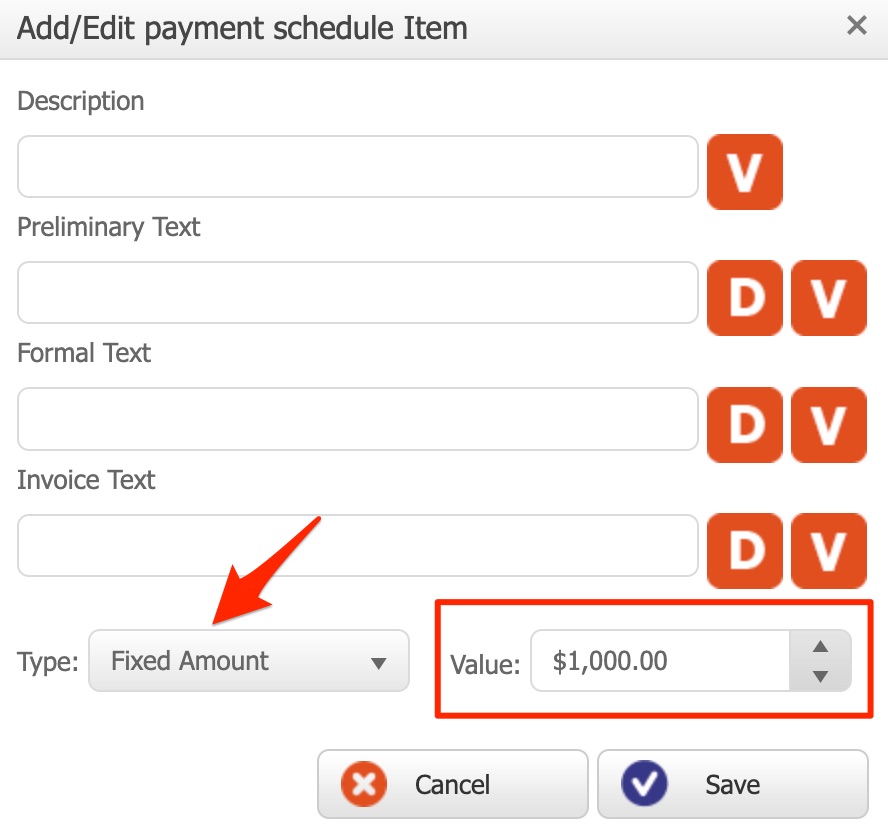
Fixed Amount items are a fixed dollar amount. This is great for something like a deposit. In this example, we'll set up a $1000 deposit.
1. First, click the Type dropdown and select Fixed Amount. Then, add the dollar amount in the Value box:
2. Now, add a Description to your payment schedule item:
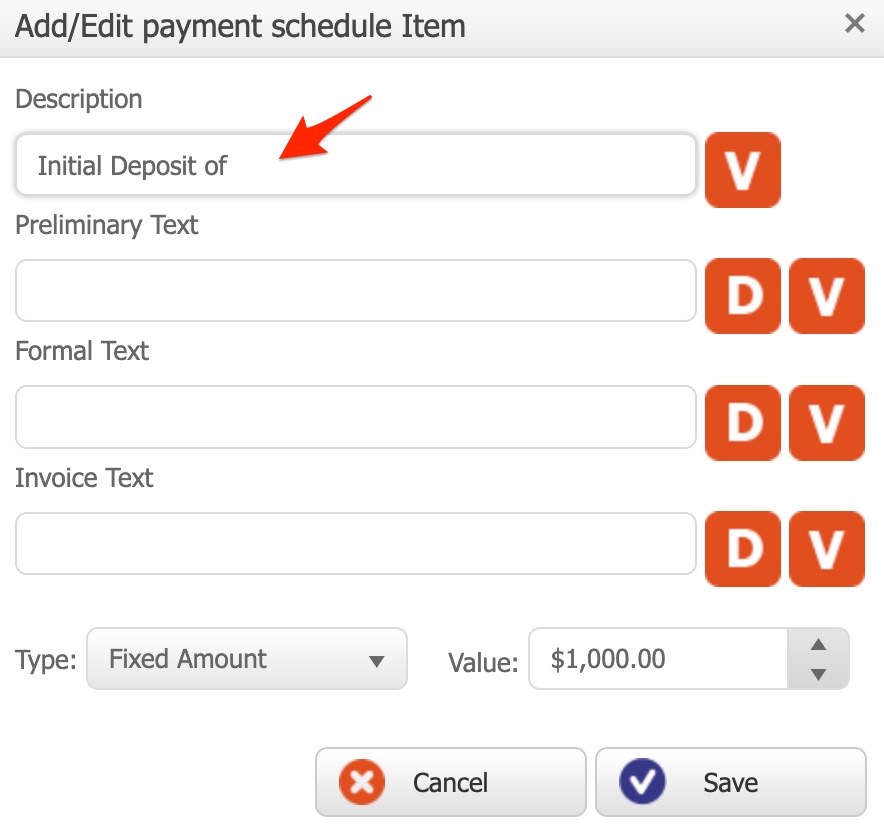
3. Next, click the orange V button to insert the value ( [val] ):
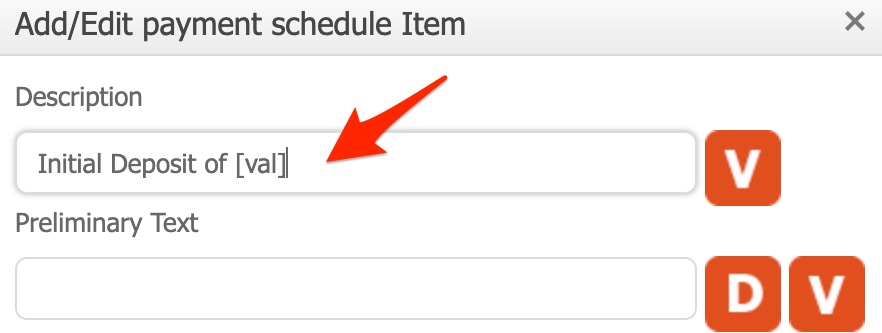
This will add the dollar value to the description. It will say [val] here, but on your reports, it will automatically show the dollar amount.
4. Now, we need to fill in the Report Text for our various reports. The same schedule item can have something different for your preliminary proposal, formal proposal and invoice text.
In this case, we'll make it the same text for each report.
So, we'll click D to autofill our Description from the top into each report box:
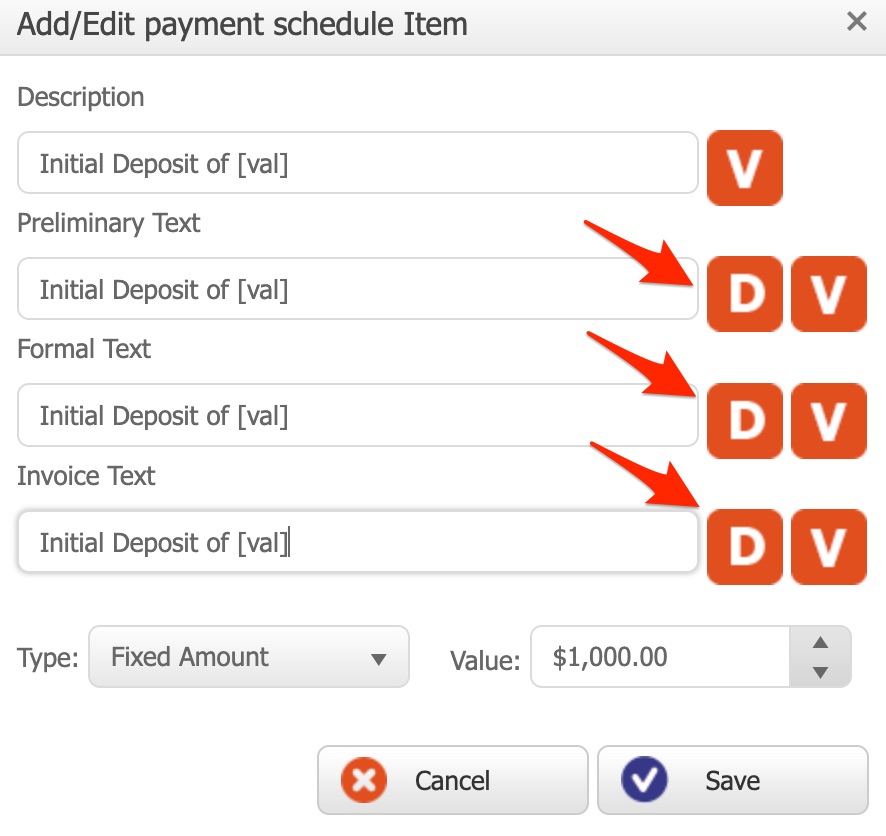
Be sure to click Save.
Percentage Of
Let's click Add Item again, but this time we'll calculate based on a Percentage of the project cost. This will automatically show a certain percentage of the project cost as the value for this item. This is handy because you can use the same schedule over and over again for multiple estimates.
In this case, we'll set up a “Two week checkin payment” of 50%.
From the Type dropdown, select Percentage of. Then, we'll add our percentage to the Value box:
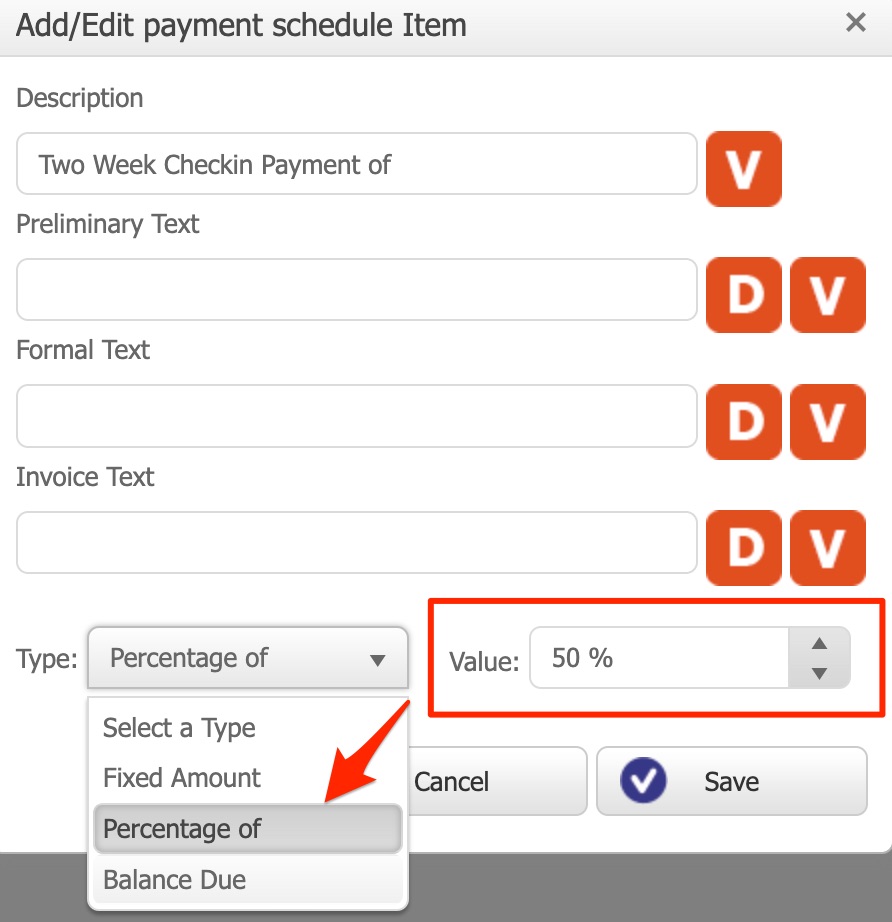
Now, we'll add in our Description, and we'll add our Value (orange V button). Then, we'll autofill out our Report Text using the D buttons (the same as we did in the previous example):

Then, hit Save.
Balance Due
Lastly, we can set up one last item to show the remaining balance. We can do this using Balance Due. Balance due items will automatically total up the remaining project cost, and display that as your total.
Select Balance Due from the Type dropdown. You won't need to type anything in the Value box for balance due, but you will need to insert the [val]:
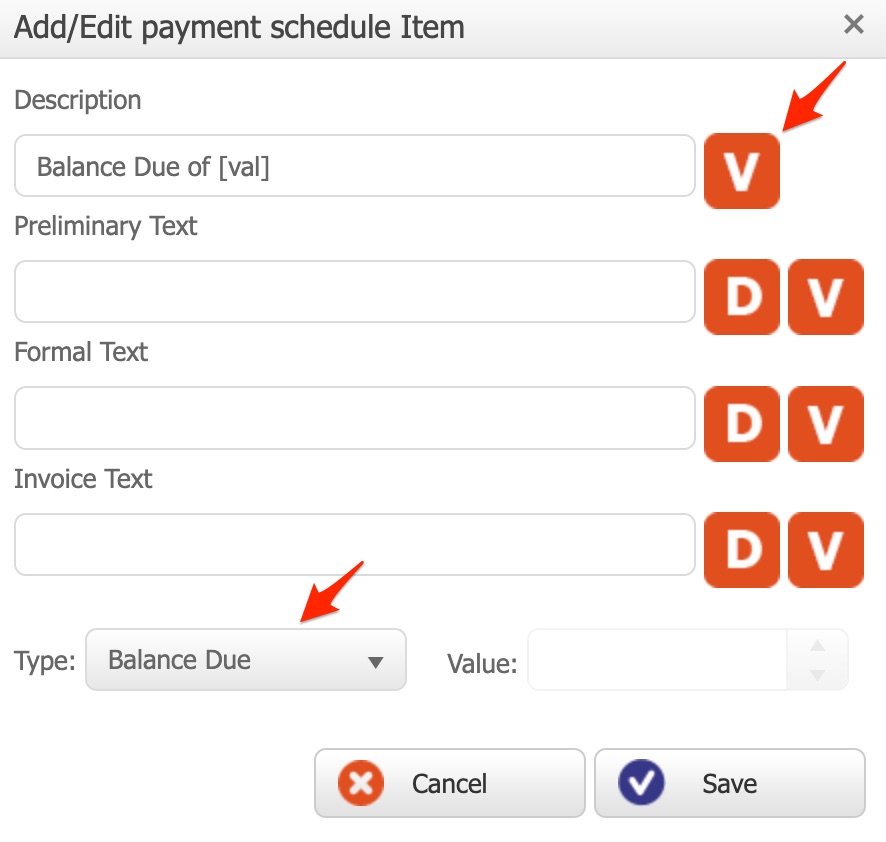
Then, just fill in the rest of the Report Text, the same as we did in the earlier examples.
Now we've added all our items!
Important!
Adding the Schedule to Reports
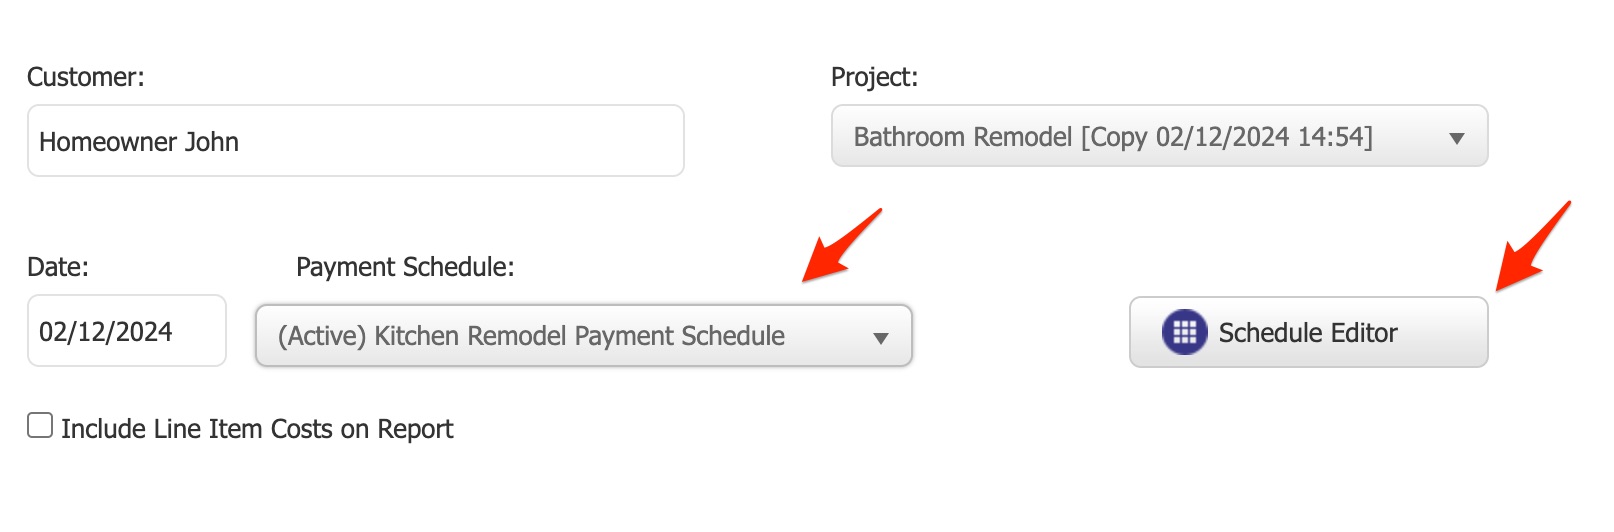
When we're ready to apply this payment schedule to a project, open the estimate and click Reports. Then, click Formal. Then, choose your payment schedule from the Payment Schedule dropdown:

Select your payment schedule. If needed, you can then use the Schedule Editor to make project-specific adjustments to your payment schedule. This is great for adding something like a due date to your schedule item, specific to this estimate only:
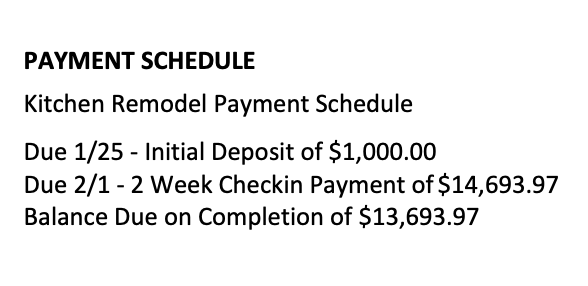
Now our payment schedule is included at the bottom of our proposals:
That’s it! Please let us know if you have any questions.
